It was my sister in law’s birthday this past week. Last year I made her a quilt cake she loved. This year, the recent lovely pool weather inspired me to go with a summer theme.
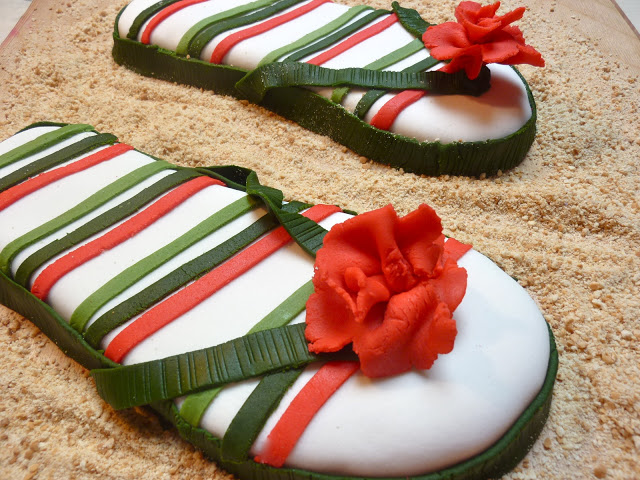
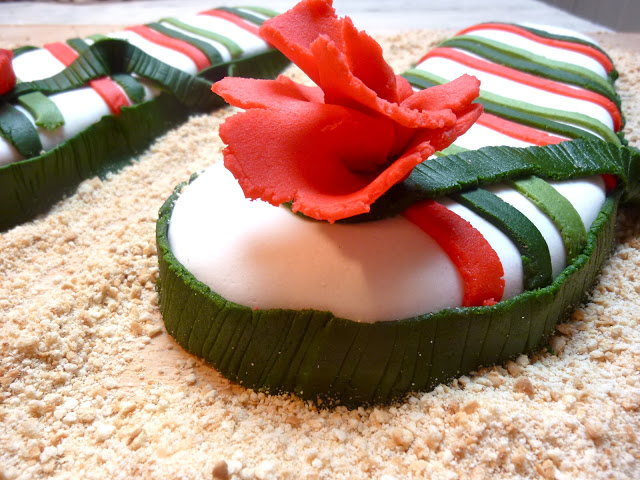
Flip flops cakes are not new but it was fun to try my hand at one. Once I had this one finished, I imagined all sorts of designs and colors for fantasy flop flops cakes of the future.
Most of the kids in our family don’t like fondant so it was important to make something special for the cake part. After doing the work of peeling off the fondant to get to the cake, they should at least have a tasty reward.
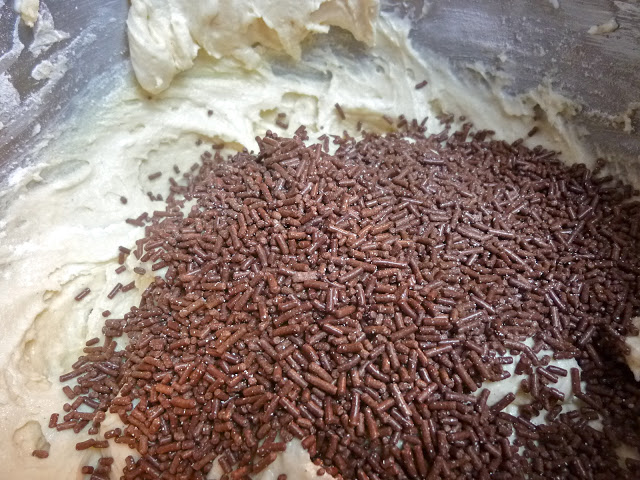
The sprinkles were a last minute addition to the cake batter and they definitely boosted the cake into the special category.
After cutting the flip flop shapes from the cake, there was a minute when I was flip flopping myself. I went back and forth over possibly forgoing the fondant covering entirely to simply add some trim because the cake already had a sort of leopard print.
I forged on and was really happy with the result. The cake itelf was moist and flavorful and very well received by both kids and adults.
There was additional flip flopping over using the word “sprinkles” over “jimmies” in the post title. Where I grew up, these were called sprinkles so I went with that. Please excuse my transgression if you disagree.
Chocolate Sprinkles Flip Flops Cake
For the Cake:
Ingredients:
- 2 + 1/2 cups flour
- 2 teaspoons baking soda
- 1/2 teaspoon salt
- 1+1/3 cups butter
- 1+1/4 cups sugar
- 3 eggs
- 1 teaspoons vanilla extract
- 1 teaspoon vanilla paste
- 1+1/3 cups sour cream
- 1/2 cup chocolate sprinkles
Directions:
- Preheat oven to 350 degrees F
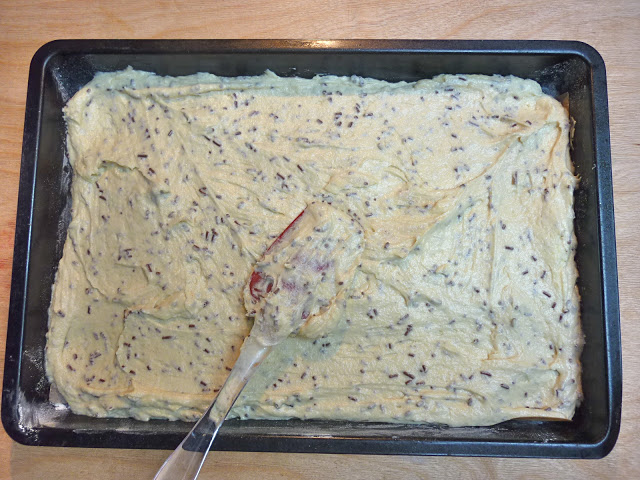
- Line a sheet cake pan (mine was 15 in x 10+1/2 in) with parchment paper and grease the paper and the sides of the pan. Cover with flour and shake off the excess.
- In a separate bowl, sift together the flour, baking powder and salt and set aside.
- Cream the butter and sugar together.
- Add the eggs one at a time.
- Whisk together the vanilla extract, bean paste and sour cream.
- Alternately add the sour cream and flour mixtures until everything is combined.
- Stir in the sprinkles and pour into the prepared pan.
- Bake for 20-25 minutes or until a skewer inserted into the center of the cake comes out clean.
- Remove from oven and cool completely.
For the Buttercream:
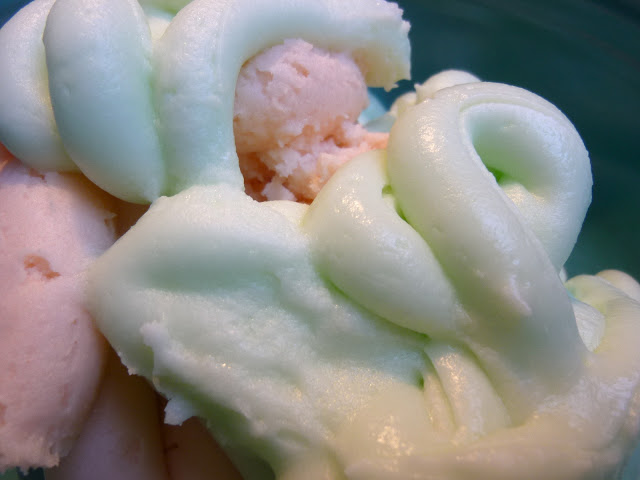
I used some leftover misc. flavored buttercream I had on hand. The purpose of the buttercream is to adhere the fondant to the cake not so much to add flavor so you can pretty much use any neutral flavor you like. Make about half or 1/4 of a normal recipe.
For Homemade Fondant:
- 1/2 bag (1/2 pound) marshmallows (minis melt faster but you can use regular sized ones as well.)
- 2 tablespoons of water
- 1 pound of powdered sugar
- Crisco or shortening
- plastic wrap or cling film
- Gel or paste food coloring
Directions:
- Cover the inside of a heat safe bowl and a wooden spoon with Crisco or shortening.
- Place marshmallows and water in the bowl.
- Microwave the marshmallows for 30 seconds at a time stirring the mixture in between with the wooden spoon.
- When the mixture is the consistency of Marshmallow Fluff, stir in 3/4 of the powdered sugar one cup at a time.
- Cover your work surface with powdered sugar and cover your hands with Crisco or shortening.
- Dump the fondant on the sugared surface and knead the rest of the sugar in.
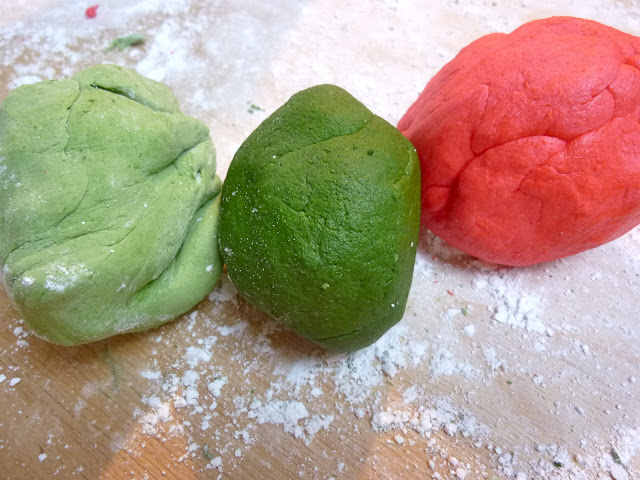
- Separate the fondant into different parts and color as desired by adding a few drops of gel colors at a time and kneading it in until the color is evenly distributed and you get the color you want.
- Wrap each piece in plastic wrap until you use it.
- Wrap leftover fondant tightly in plastic cling film and store in a zip lock bag.
Assemble the Cake:
- 1 large sheet of thin cardboard
- Scissors
- 1 package of vanilla cookies
Directions:
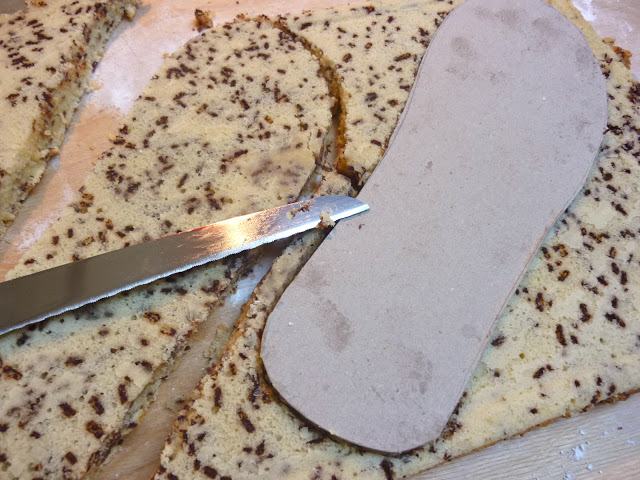
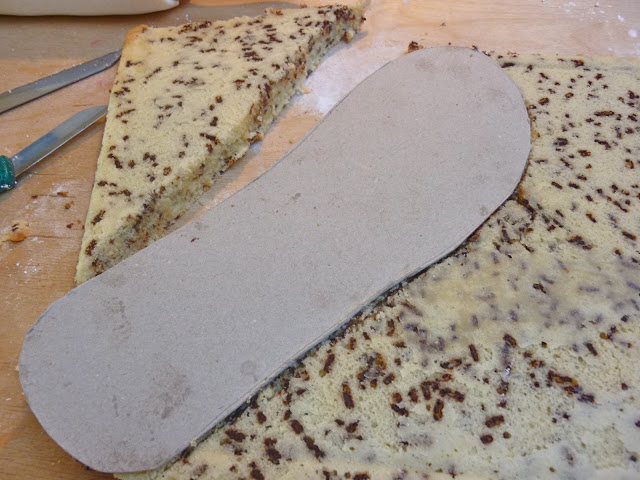
- Cut a Right or left foot flip flop shape out of a piece of thin Cardboard. I traced my own size 8+1/2 flip flop but you can make the flip flops any size you like depending on how many people the cake has to feed.
- De-pan the cake, flip it over and gently peel the parchment paper off. The surface should be nice and smooth.
- Place the cardboard shape on one side of the cake and use a knife to cut around it.
- Flip the shape over and repeat on the other side of the sheet cake. You should now have right and left flip flops.
- Remove the cake scraps and set aside.
- Position the shapes on your serving platter, board, etc.
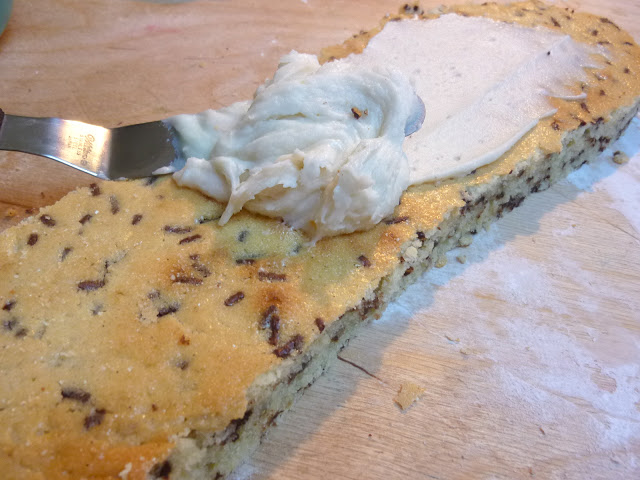
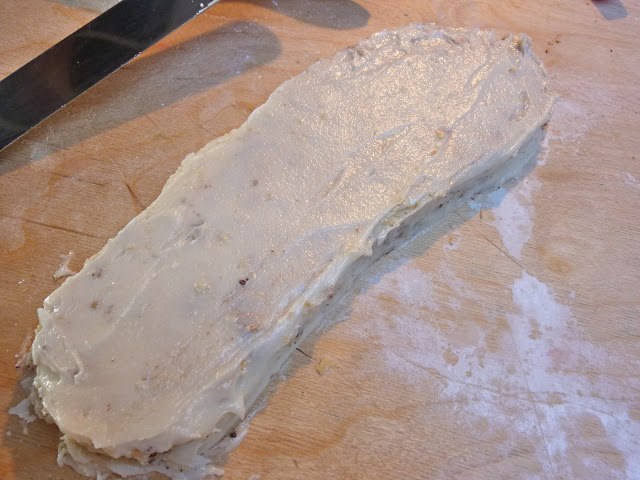
- Cover one flip flop cake with a thin layer of buttercream.
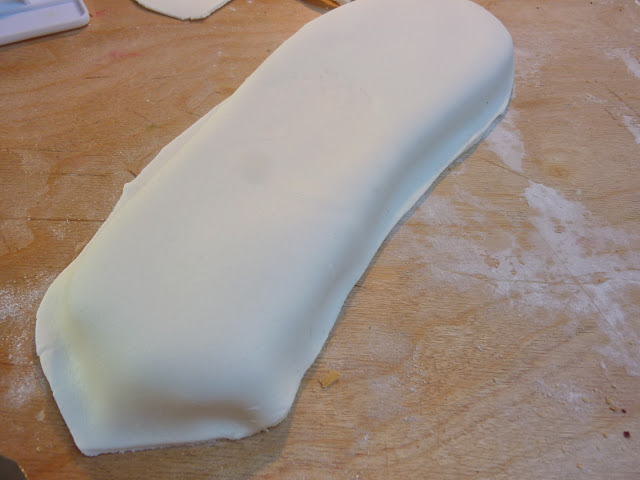
- Roll out the fondant color you want to use for the background in a rectangle shape a few inches bigger all around than the cake shape.
- Roll the fondant around the rolling pin, carry it over to the cake shape and unroll the fondant onto the cake.
- Gently smooth it out on the top and side and cut away excess.
- Repeat with the other flip flop.
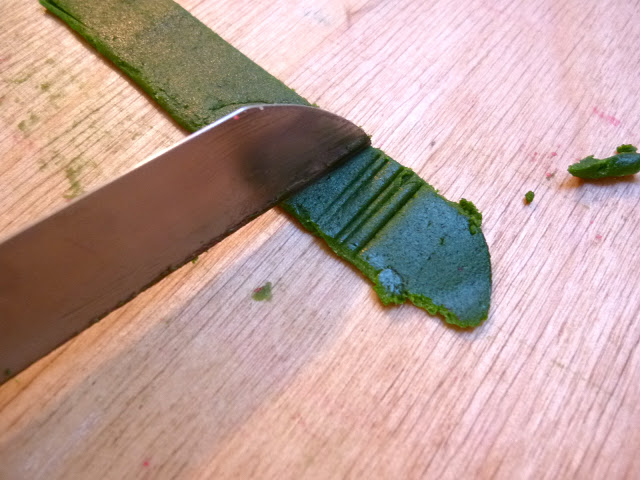
- Roll your contrasting color into a long thin log.
- Starting on one end, flatten with the rolling pin into a long strip.
- Take your knife and make indentations along the strip.
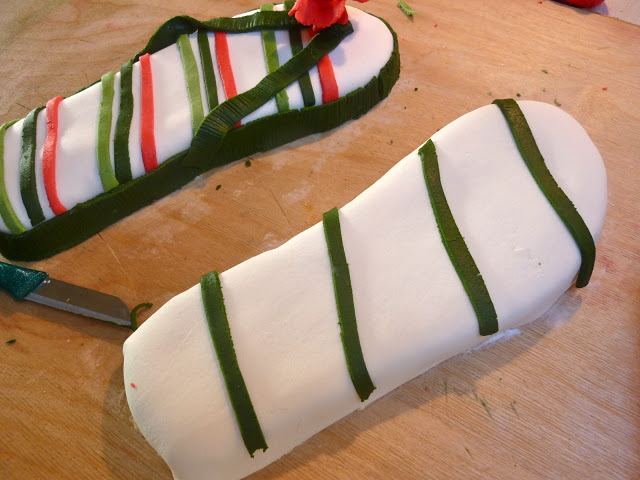
- Lay the strip around the sides of one of the flip flop shapes and trim away excess.
- Repeat with other flip flop.
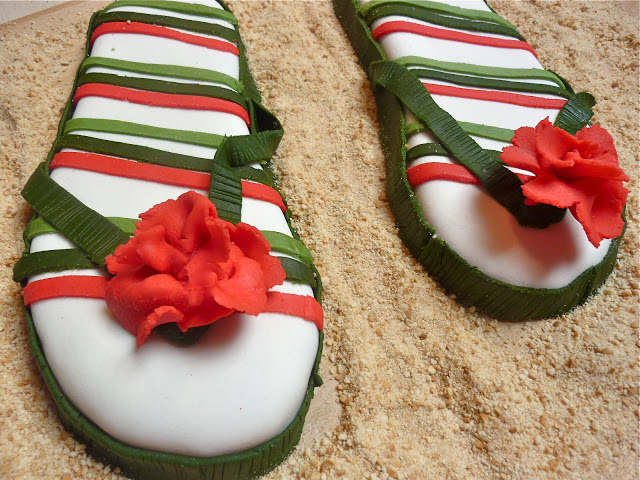
- At this point you can do whatever you want. I chose a stripe pattern. So I just cut out the stripes and adhered them to the flip flops. You can also use small cutters to create any pattern or theme you like.
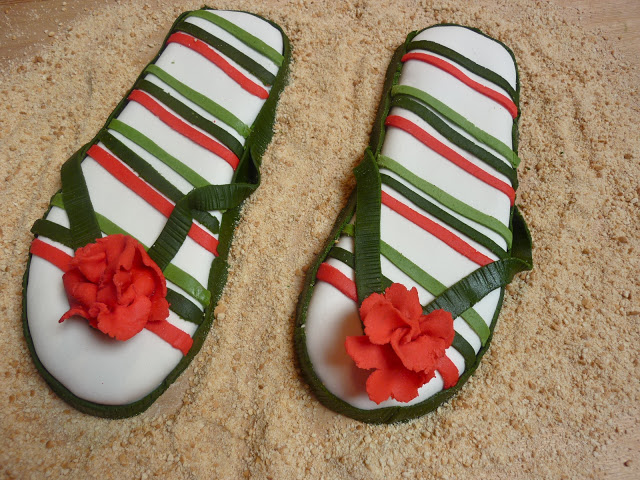
- Roll out another fondant log in the color you want the straps to be.
- Make indentations with the knife and trim each side so you have a strip with indentations. Cut this strip in half widthwise.
- Make a small ball with the same fondant color and push it into the flip flop where it would go between the toes.
- Attach one end of each strip to the ball and the other end to either side of the flip flop.
- Repeat on the other side.
- For the flowers, roll out a piece of fondant into a thick strip about 6 inches long. Rolled the fondant very thin and the edges will naturally ruffle.
- Starting at one end and pinching the bottom, roll the piece creating the petals as you roll it up. Secure it to the center where the flip flop straps meet on top of the ball by gently squeezing everything together.
- Put the vanilla cookies into a food processor and grind them until you have crumbs.
- Sprinkle the crumbs around the flip flops.
- Cut the leftover cake scraps into small pieces (I made triangles) and arrange on a separate plate for extra treats.

9 comments
OK. What?! You are a mad talented hausfrau. This is crazy cute!
I'm like everyone else…I thought they were a real pair of flip flops! Love the pattern and the colours and the fact that you made a pair! Here in Canada I believe we call the chocolate sprinkles *sprinkles* I've only ever heard of them referred to as Jimmies in the US.
Wonderful cake (s) I just love it (them) 🙂
Very cute flip flops and cool idea with the sprinkles. We call them sprinkles here in Australia so I'm agreeing with you on that one.
I seriously could have SWORN that these were real flip flops! They are adorable!
I had to do a double take when I first saw your photo. Wow! This is my first time seeing a flip-flops cake. Your sister-in-law is a lucky lady, as are the kids, who have been given the special treatment following the fondant! You are brilliant! That image is going to be in my mind all summer.
We always called them sprinkles, too. I used to always love the idea of "funfetti" cake. Your flip flops are too cute–I'd actually like a pair like that for my feet!
Beyond adorable! I thought they were real shoes at first!
You are like an artist – these are stunning! And I don't think I've ever had cake with sprinkles *in* it but it sounds wonderful.
Absolutely adorable pair of flip flops !