

For years I’ve always envied the little pumpkin shaped cakes I’ve seen on blogger and food sites. I finally bought myself two of those mini bundt pans to pull off this little pumpkin cake miracle and of course, they sat in my pantry for over a year.
Since I had the idea for Thanksgiving this year to serve platters of small size treats for dessert (so everyone can taste everything without taking a whole piece of cake or pie then inevitably able only able to take a few bites), it was time to try to pull off this mini pumpkin cake feat myself.
I had leftover buttermilk from a huge cupcake making marathon and some pumpkin puree I made with the first sugar pumpkins I spotted this season. So I put them together to make a pumpkin buttermilk pound cake. The density of pound cake works great when working with cake molds.
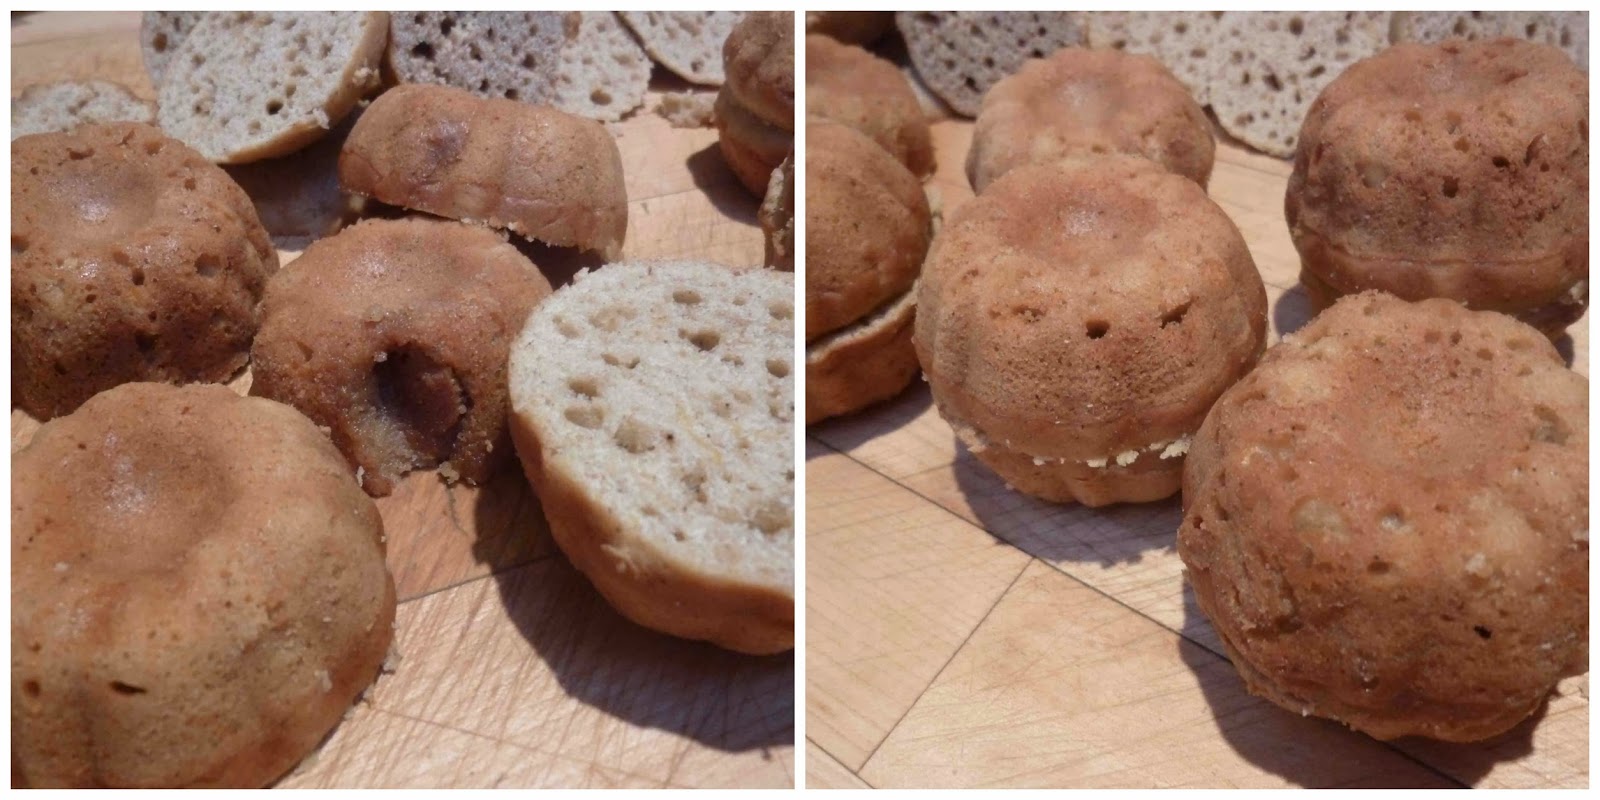
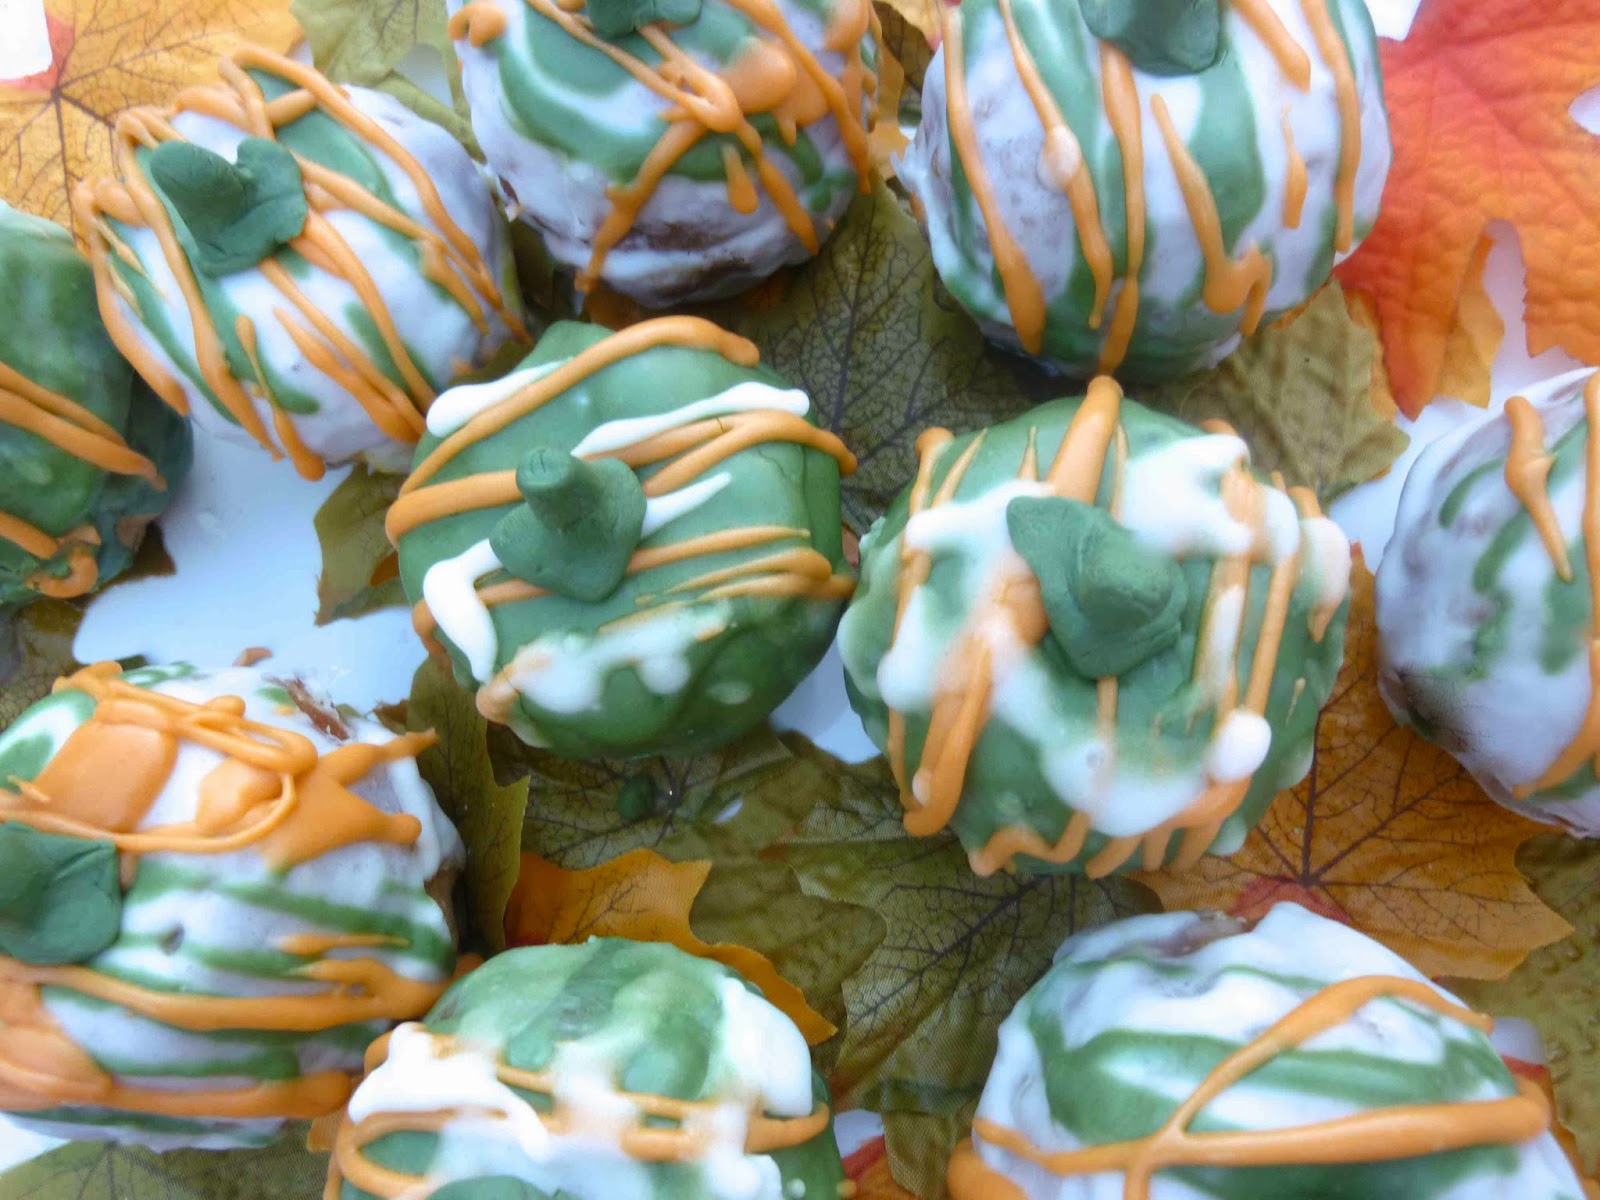
After the mini bundts were baked, I used a sharp knife to trim the excess cake off of each one and glued the two halves together with some leftover buttercream (also from the above mentioned cupcake marathon.) I cooked up a batch of heavy glaze I used on my Day of the Dead Skull Cake, separated and tinted it with paste food coloring. I used one color to cover the cakes and then drizzled contrasting colors on top. I wanted a more free form, Jackson Pollock technique, instead of imitating perfect pumpkins. I got a little carried away with the drizzle method and there may or may not be stripes of colored frosting all over my kitchen walls.
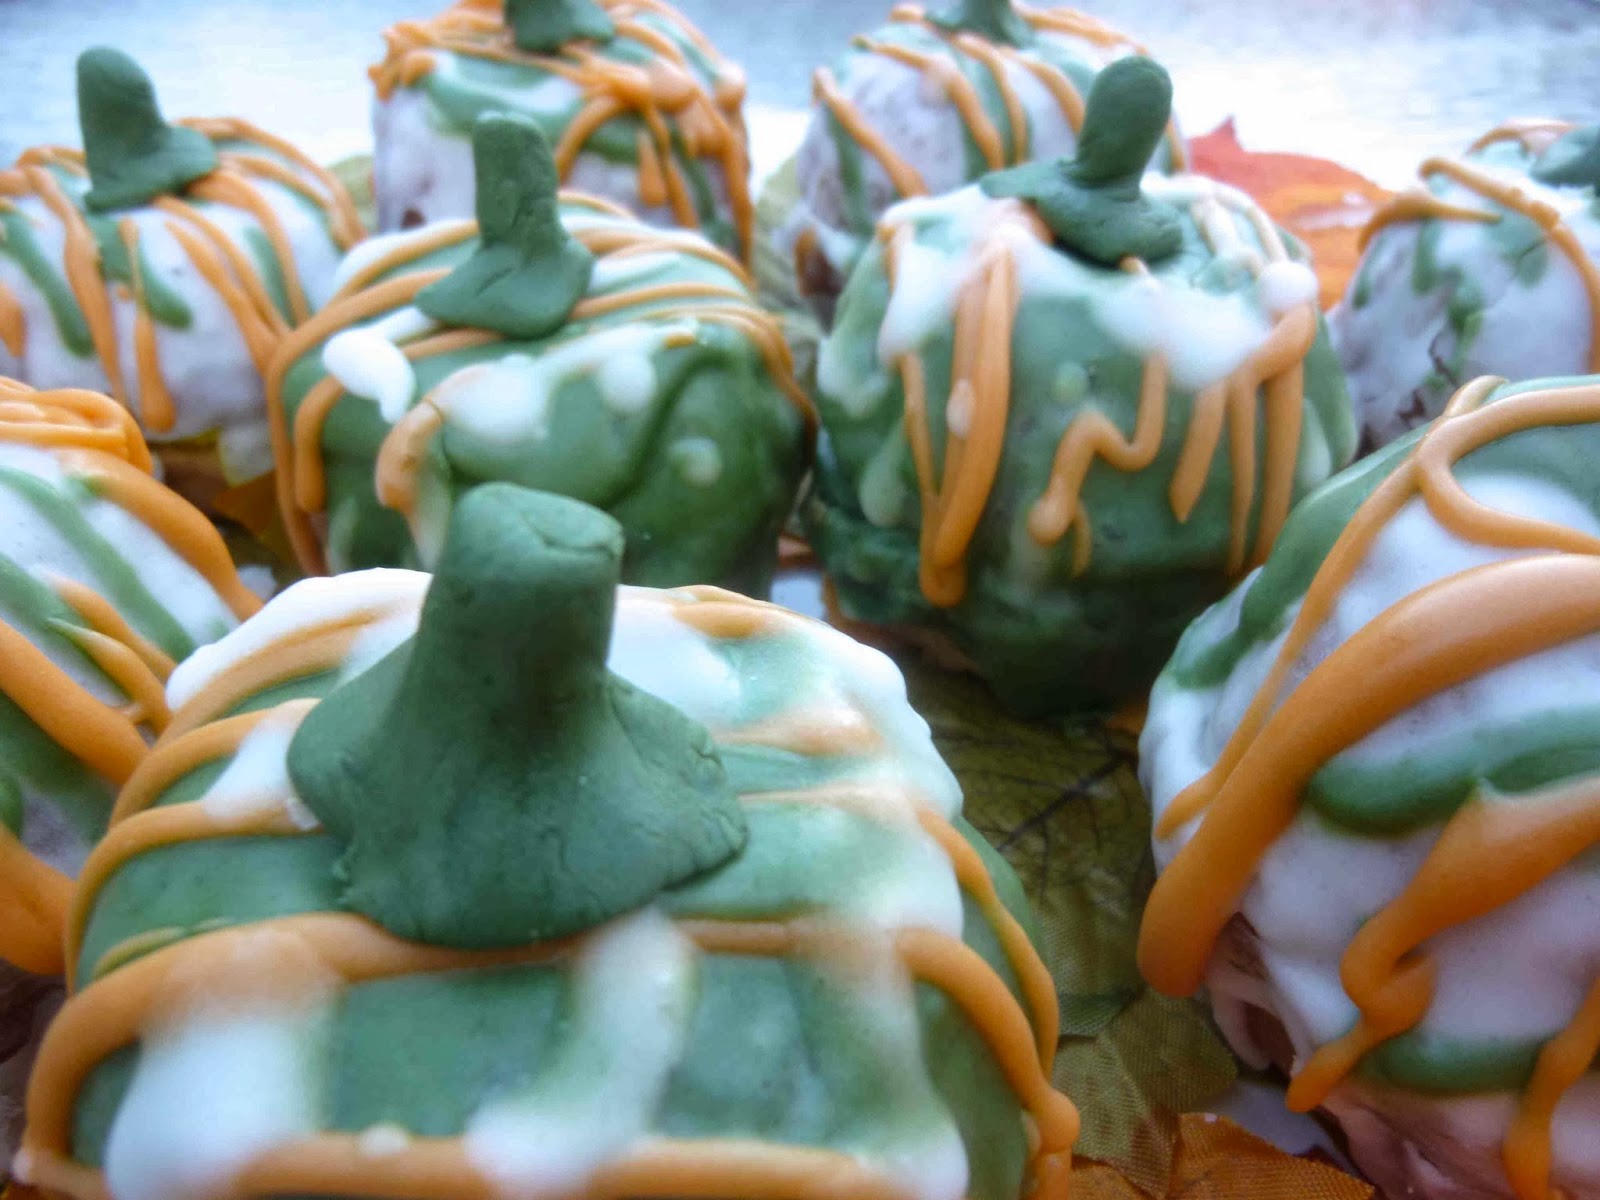
Forging onward, leftover homemade fondant was tinted green for the stems on top which really finished them off. The completely pumpkin shaped cakes were plated over a bed of fake fall leaves.
The pumpkin buttermilk combo has great flavor and is not too sweet. However, the glaze makes up for that plenty. Fun and flavorful. A keeper for a Thanksgiving feast.

For the pumpkin buttermilk pound cake:
Ingredients:
- 1+1/2 cups AP flour
- 1+1/2 cups whole wheat flour
- 2 teaspoons baking powder
- 1 teaspoon baking soda
- 1/2 teaspoon salt
- 1 teaspoon allspice
- 2 sticks butter – room temperature
- 2-½ cups packed dark brown sugar
- 1 teaspoon vanilla extract
- 1 cup pumpkin purée
- 4 large eggs, at room temperature
- 3/4 cup buttermilk
- Preheat oven to 350 Degrees F.
- Cover 2 mini bundt pans with cooking spray and then flour.
- In a separate bowl whisk together flours, baking powder, baking soda, salt and allspice. Set aside.
- Cream butter and sugar together. Add vanilla and pumpkin puree.
- Beat in Eggs one at a time.
- Add flour mixture in three parts, alternating with the buttermilk, starting and ending with the flour mixture.
- Fill a pastry bag with the batter and pipe into the mini bundt pans, filling each a little over half full.
- Bake for 15-120 minutes or until a knife inserted in the center of the cake comes out clean.
- Remove from oven and let cool in pan for 5 minutes then remove cakes from pan and transfer to a wire rack to cool completely.

For homemade marshmallow fondant:
Ingredients:
- 1/2 bag (1/2 pound) marshmallows (minis melt easier but you can use regular sized ones as well.)
- 2 tablespoons of water
- 1 pound of powdered sugar
- Crisco or shortening
- plastic wrap or cling film
- Gel or paste food coloring
- Cover the inside of a heat safe bowl and a wooden spoon with Crisco or shortening.
- Place marshmallows and water in the bowl.
- Microwave the marshmallows for 30 seconds at a time stirring the mixture in between with the wooden spoon.
- When the mixture is the consistency of Marshmallow Fluff, stir in 3/4 of the powdered sugar one cup at a time.
- Cover your work surface with powdered sugar and cover your hands with Crisco or shortening.
- Dump the fondant on the sugared surface and knead the rest of the sugar in.
- Separate the fondant into different parts and color as desired by adding a few drops of gel colors at a time and kneading it in until the color is evenly distributed and you get the color you want.
- Wrap each piece in plastic wrap until you use it.
- Wrap leftover fondant tightly in plastic cling film and store in a zip lock bag.
- Trim the excess cake off of each mini bundt, glue together with some leftover buttercream or some of the glaze and set back on the wire rack placed over a baking sheet lined with parchment paper.
- Pour the glaze over the pumpkins, alternating colors to cover the whole cake. Then use a small spoon or chopstick to drizzle on he other contrasting colors.
- Fashion a small stem out of green fondant and place on top.

1 comment
These look so much fun to eat, and I bet they're tasty too!! Great addition to the holidays…