
1.1K


Ever since I saw these wonderful ice cream cone shaped cupcakes on other bloggers sites I have wanted to make them. I used the upcoming holiday to give them a colorful Valentine’s day spin.

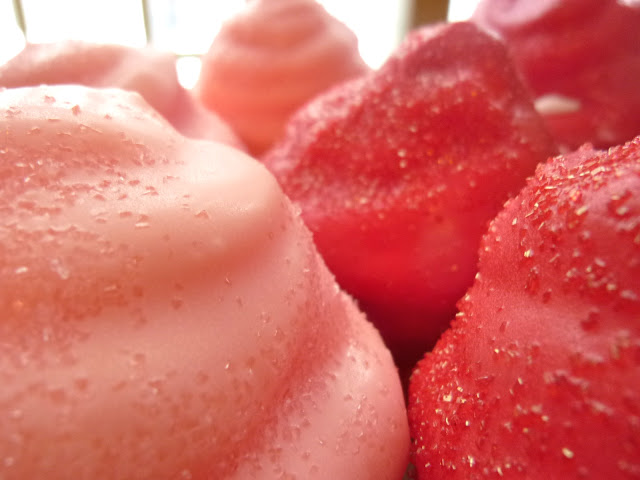
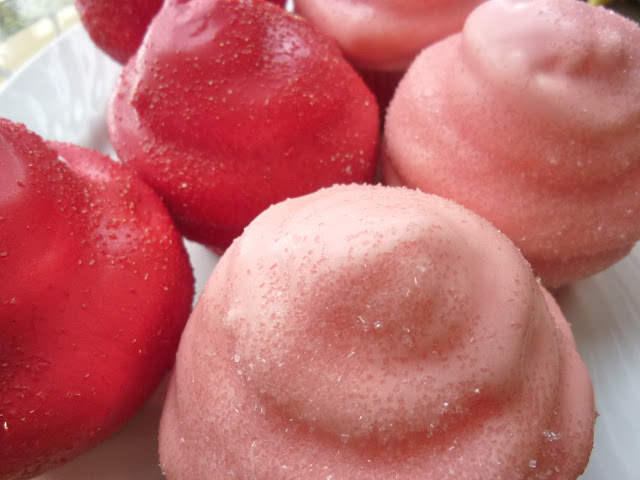
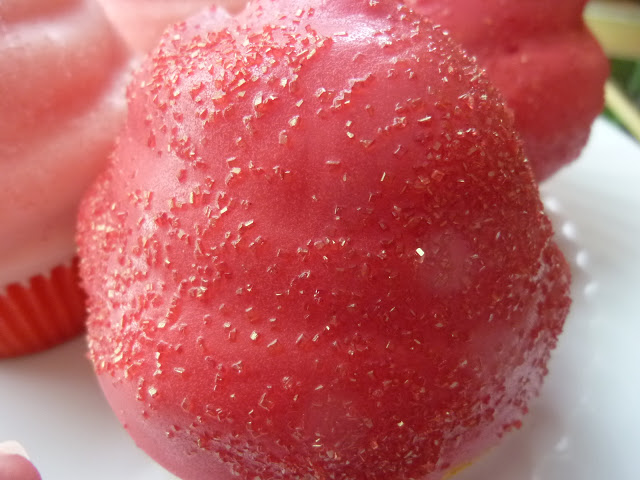
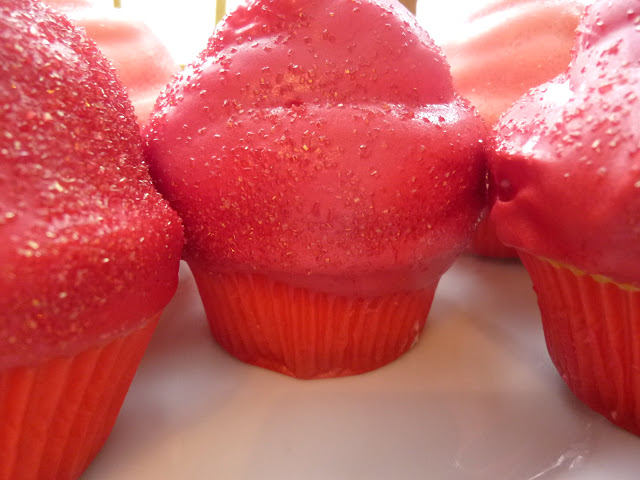
I did cheat a bit and used red and pink candy melts for dipping instead of coloring the chocolate myself.

After dipping and before the melts could harden, I sprinkled edible sugar glitter in pink and red on the tops.

For the cupcake flavor, I went with cherry vanilla.


These cupcakes are labor intensive but definitely worth it in style and flavor. I served them at a dinner party that evening and everyone was sufficiently impressed.
Valentine’s Day Cherry Vanilla
Hi Hat Cupcakes
Loosely adapted from this recipe from the King Arthur Flour blog

For the Cupcakes:
Ingredients:
- 2+1/2 cups flour
- 1 teaspoon baking powder
- 1/4 teaspoon salt
- 2 sticks (1 cup) butter
- 2 cups sugar
- 4 eggs
- 1 cup milk
- 1 teaspoon vanilla extract
- 1 teaspoon cherry extract
Directions:
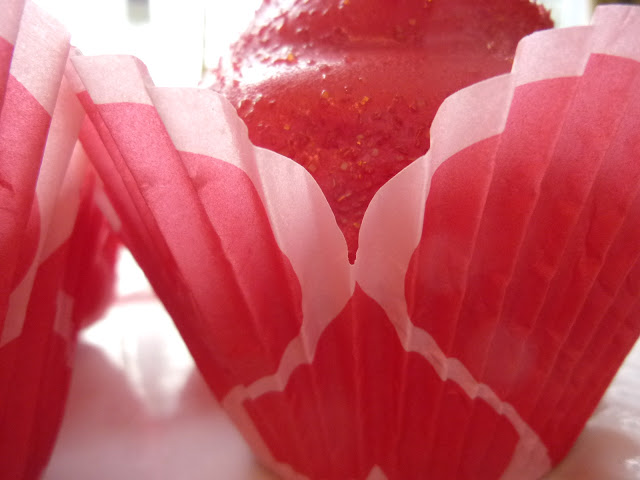
- Preheat oven to 350 degrees F and place liners in two cupcake pans.
- Whisk flour, baking powder and salt together in a bowl and set aside.
- Beat butter until fluffy, about 3 minutes.
- Add sugar until combined.
- Add eggs one at a time.
- Beat in extracts.
- Add flour mixture and milk alternating a bit at a time.
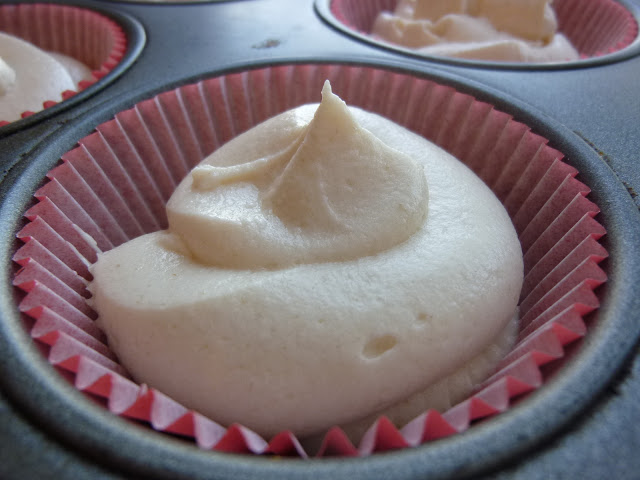
- Place a ziplock bag in a large drinking glass by stuffing one corner down. into the bottom of the glass. Fold the opening over and fill with the batter.
- Squeeze excess air out of the bag, zip it closed and snip a hole in one corner of the bag.
- Twist the top part of the bag, squeeze and fill the cupcake liners 3/4 of the way.
- Bake for about 20 minutes or until a knife inserted in one of the cupcakes comes out clean.
- Remove from oven and cool completely.
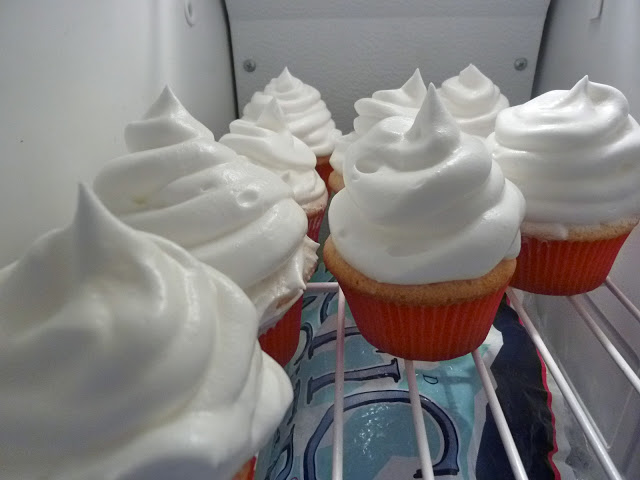
For the Marshmallow Topping
The step by step tutorial at King Arthur Flour is very comprehensive and helpful.
Ingredients:
- 1+1/2 cups water
- 1 cup sugar
- 1/2 cup meringue powder
Directions:
- Bring water to boil in microwave or stove top.
- Pour in sugar stirring constantly until dissolved.
- Let cool.
- Add meringue powder and whip about 10 to 15 minutes until mixture is very stiff, like beaten egg whites.
- Load mixture into a disposable pastry bag or zip lock using method above and snip a hole in the corner.
- Pipe swirls onto the cupcakes and place finished cupcakes in the freezer for at least 4 hours.

For the Coating:
Ingredients:
- 1 bag of candy melts (I used a half a bag of red and one half bag of red)
- 1 tablespoon crisco
- Colored sanding sugar if you like. I used pink and red to match the candy melts.
Directions:
- Place candy melts and crisco in a microwave. Microwave the candy melts 30 seconds at a time on high, stirring the mixture in between until it’s smooth.
- Pour mixture into a deep, wide heatproof glass or bowl.
- If you are using sanding sugar set a piece of parchment next to the bottle of sanding sugar.
- Remove cupcakes from freezer. One at a time submerge the cupcake in the melted candy hold upside down over the mixture and let excess drip off.
- Hold the cupcake over the parchment and sprinkle the sanding sugar over the cupcake.
- Place finished hi hat cupcake in the fridge.
- When you are finished, fold the parchment paper in half and pour the excess sanding sugar back into the bottle.

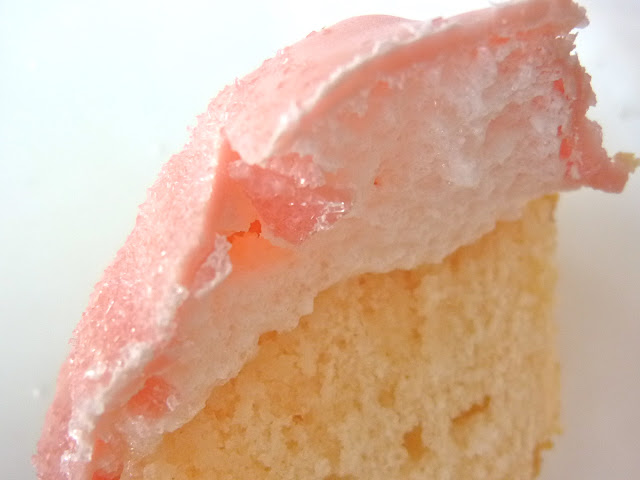
The cherry vanilla flavor is subtly delicious but the big and creamy crunch of the hi hat tops are really the star of the show.

8 comments
What would happen if you added cherry flavor to the chocolate coating? or maybe to the frosting would work better. I had expected more cherry through these before I read the recipe. Lyn
What a great idea. The more cherrier, the merrier!
These are gorgeous, perfect Valentine's treat1
I have to try hi-hats! Very pretty 😀
Nice technique! It so professionals. You come up with pretty cupcakes. Thanks for sharing this post.
Yes hihats are very inpressive, yours look wonderful. Definitely worth the effort.
I'm dying to make hi hats! That side view pic is fantastic, Lora 🙂
Those are so pretty!