Once upon a time in a galaxy far, far away, this space was solely a baking blog with a bit of travel thrown in. I used to spend most of my blog time presenting colorful, sugary, sparkly creations.
And French macarons. A LOT of French Macarons. Remember Mararon Mondays?
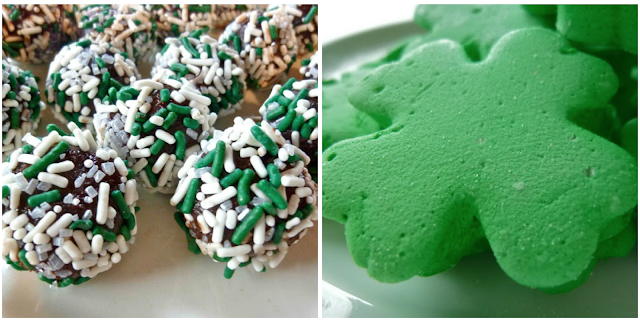
As time went on (going into my 9th year here), I’ve added savory food and recipes. Consequently, it has been some time since I’ve dragged out the food coloring and the cutters to make something bright and fun. St. Patrick’s Day was the perfect excuse, only I couldn’t decide what design cookie to make. So I made all the designs.

Well maybe not all of them but here are four you can easily make yourself. Some are easier than others but none are impossibly intricate or difficult.
Three shades of shamrocks may not be as sexy as 50 Shades of Grey but the fun factor is high.

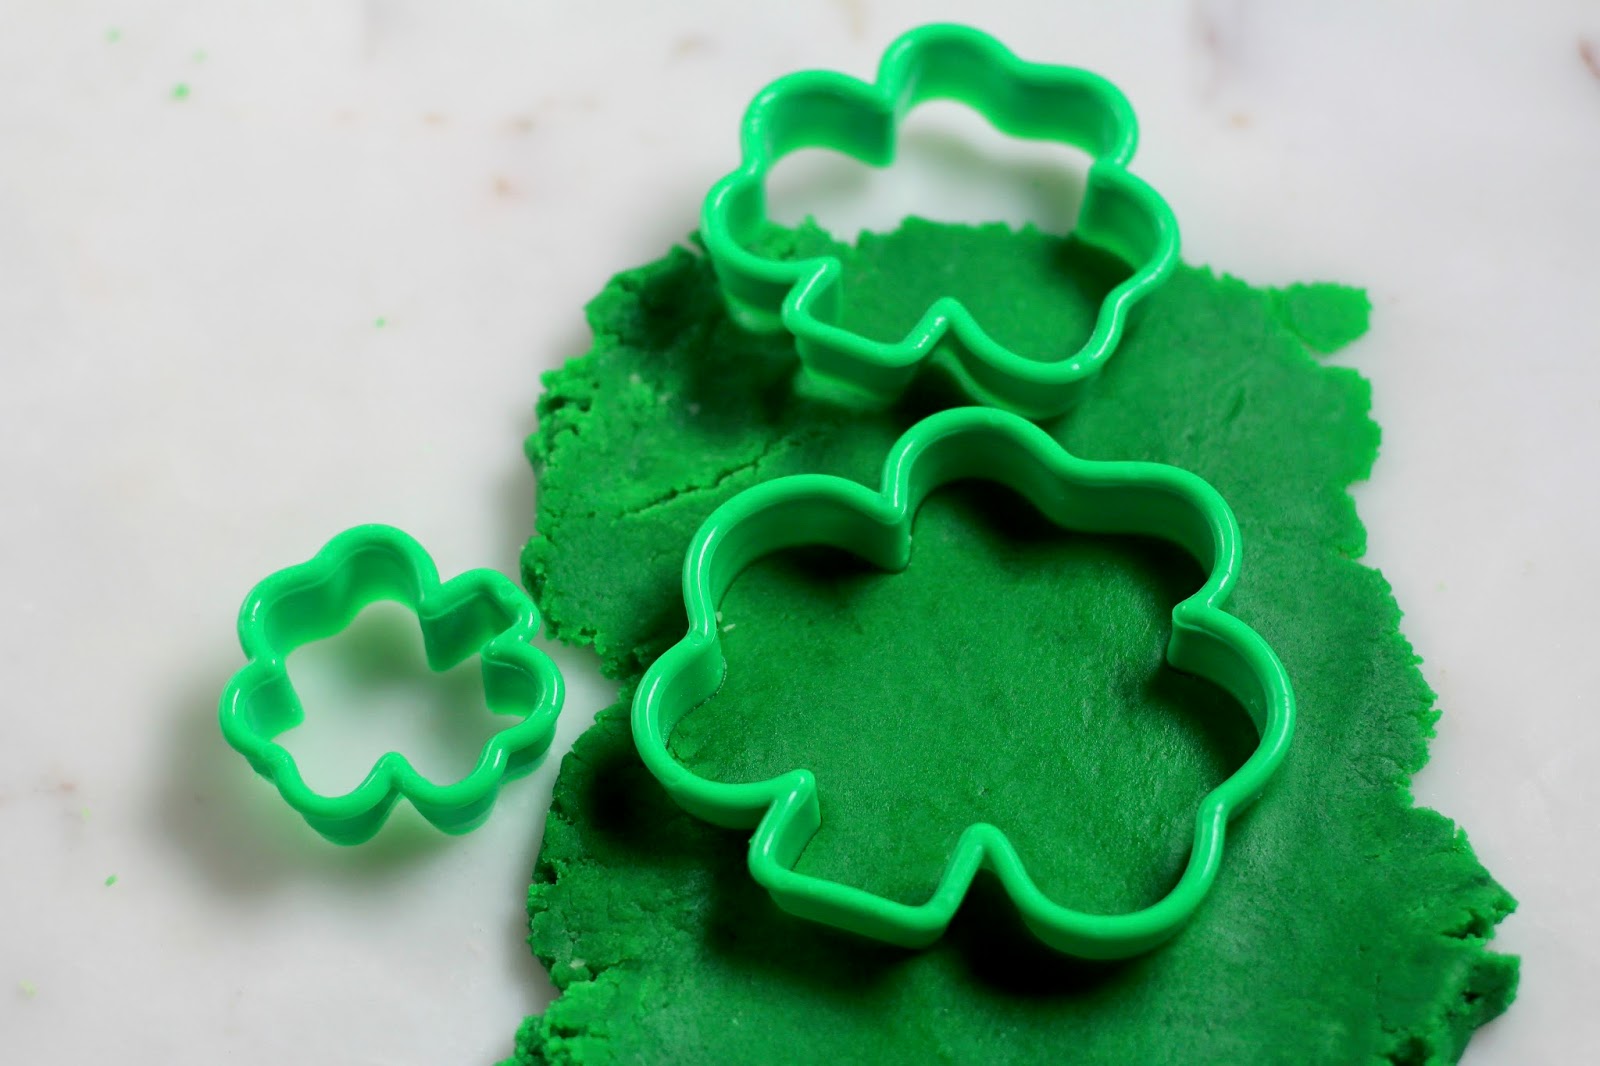
You will need your favorite rollout sugar cookie dough recipe or store-bought cookie dough, three different sizes of the same shamrock shaped cookie cutters and green food coloring. That’s all.
Once you have these four designs down you can freestyle. The rest is up to your own creativity. Layer different designs and patterns on top of one another. Mix and match. Have fun with shamrock cookie shenanigans.
I was proud of myself for showing disco dust restraint. I had a serious problem for a while, disco dusting everything in my path including possibly my husband.
However, if you want to add sugar glitter or sparkly dust to these go for it. They are holiday cookies, after all.
Don’t listen to those internet ninnies who say “ombre is over”. Ombre always produces an ooh factor, makes everything prettier and no one you serve these to is going to complain that your cookies are so 20014. I loved using three shades of green to play with these designs. You will too.

Here we go:
Color the dough:
Divide your cookie dough into three equal parts (a kitchen scale helps.)
The type of food coloring you have (paste or regular grocery store bought) will determine how much to use for each section. Start by creating the darkest shade, keeping track of how much you use. Then start by adding a few drops to the next dough portion. Work your way up to a medium shade of green by adding a few drops at a time. For the lightest shade, use only a few drops.

Prepare your work surface:
Once you have your dough tinted, lightly flour a work surface, line two baking sheets with parchment paper and preheat the oven to 350 degrees F.
Before baking, place the unbaked cookies on their trays in the freezer for 10 minutes. This will prevent the cookies from spreading out during baking.
Baking times:
I recommend 8 minutes for the large and medium-sized cookies, 6 minutes for the small-sized cookies. You want to take them out before they turn brown and discolor.
FYI: For the terraced cookies you will also need 1 cup of powdered sugar mixed with 2 -3 tablespoons of water to create a thick sugar glue to stick them together.
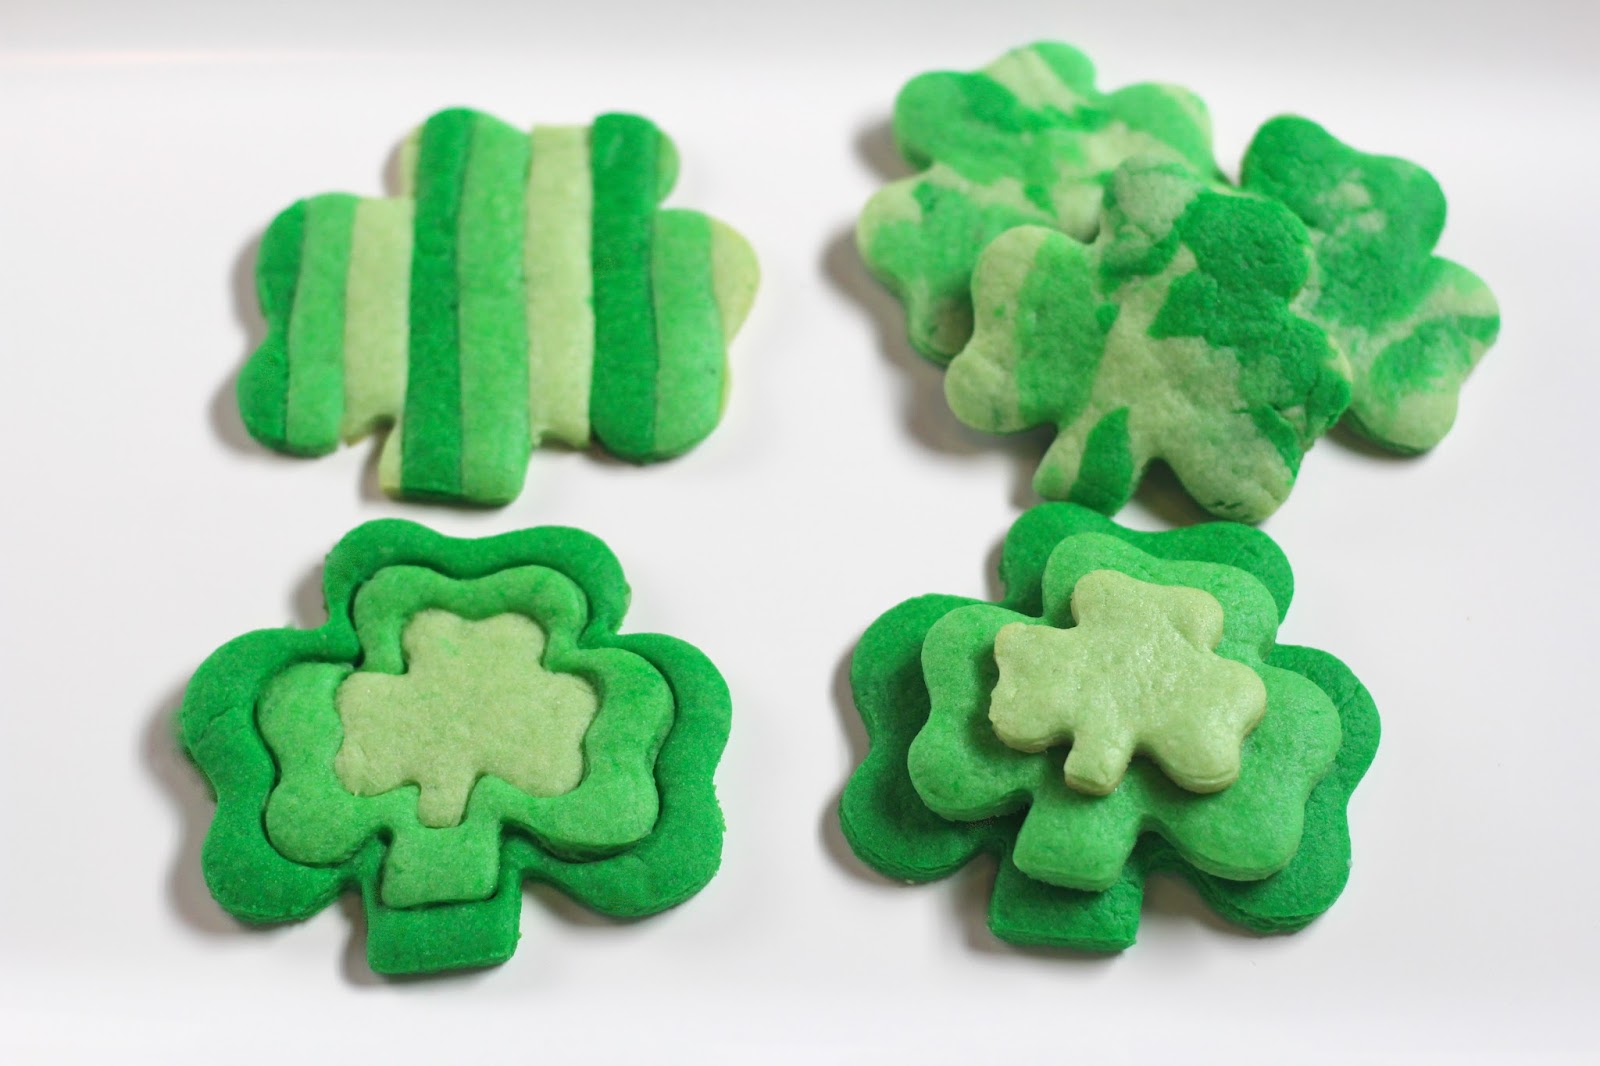
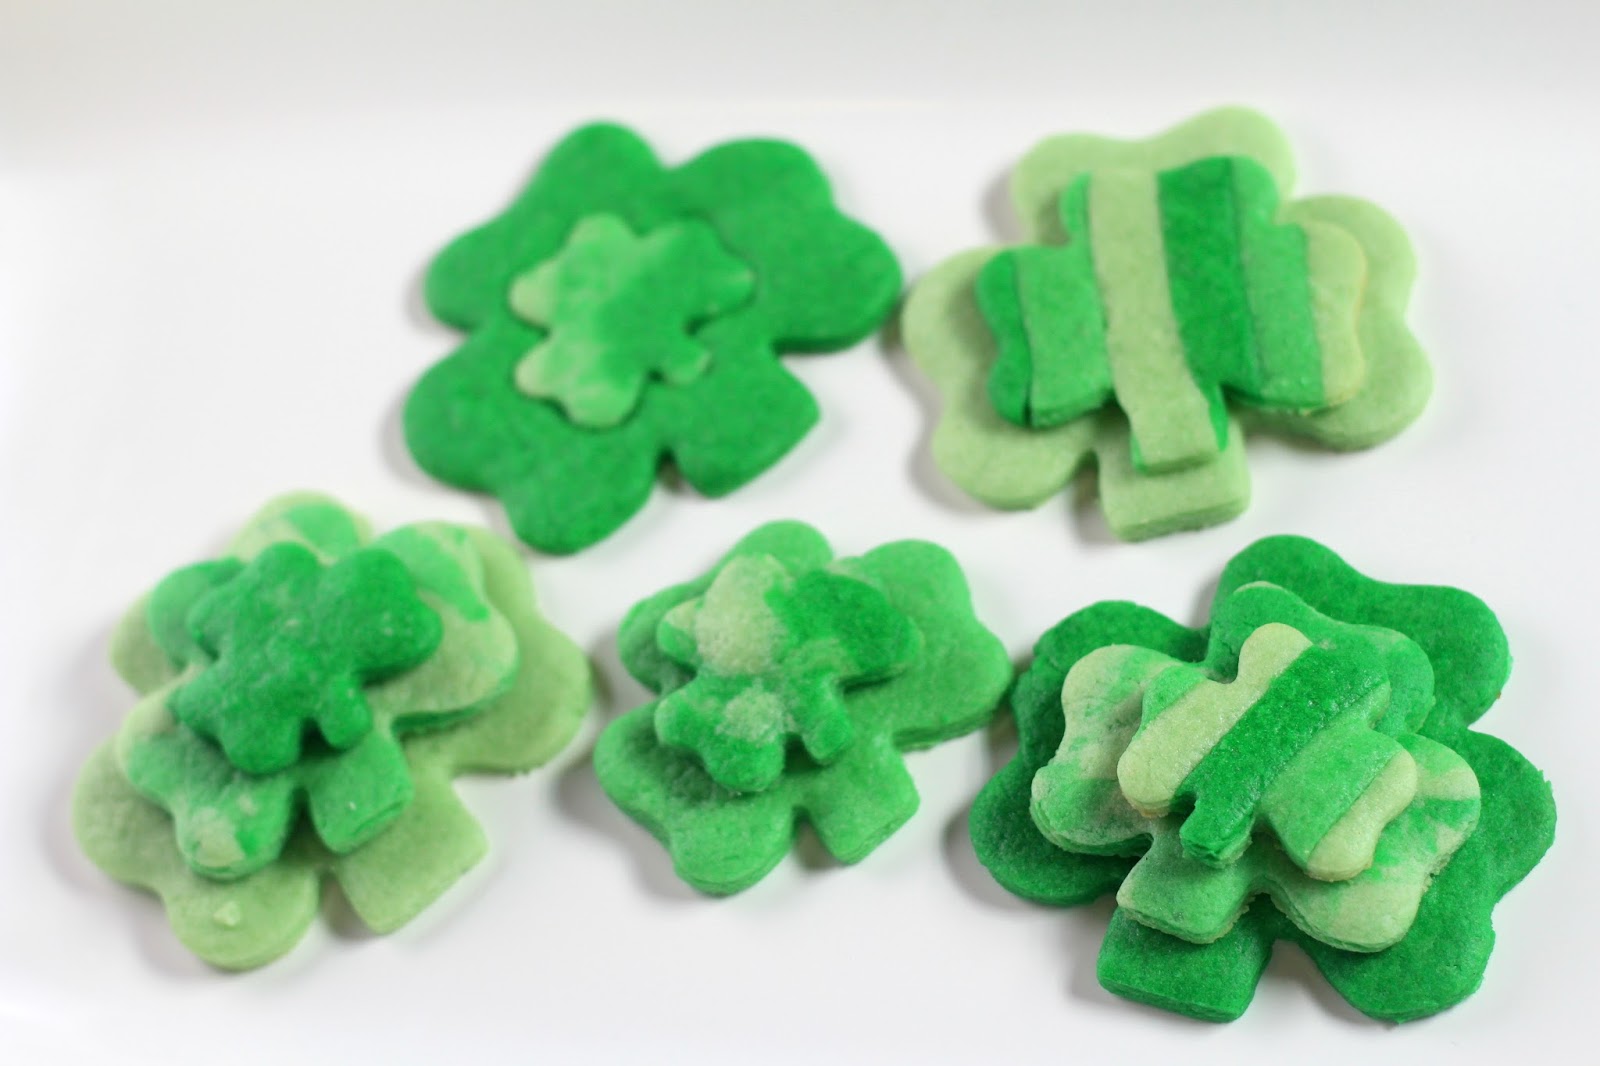
Design #1 -Terraced Shamrock Cookies

I stacked these in ombre shades light to dark and dark to light. You can mix and match the colors or just use one shade for one cookie. Up to you.
Directions:
- Roll out the dough and cut out the shamrocks sized in the color pattern you would like to stack them.
- Place on prepared baking sheets and bake as instructed.
- DO NOT stack before baking. You need to bake all the cookies separately. Large and medium-sized cookies at 8 minutes and the smallest cookie at 6 minutes.
- Remove from oven and transfer to a wire rack to cool completely.
- Once cooled, use the sugar glue described above to adhere the medium-sized cookie to the large one and the small-sized cookie to the medium one.
- Plate and serve.

#2 Green Ombre Shamrocks

- Cut out the outer layer with the large cutter.
- Use the medium-sized cutter to cut out the medium shamrock shape into the large shamrock you just cut out.
- Then use the medium cutter to cut out a medium sized shamrock in your preferred color. Place the medium-sized shamrock inside the large shamrock cutout.
- Use the small shamrock cutter to cut out a small shamrock shape in the medium-sized shamrock.
- Place the small-sized shamrock inside the medium shamrock cutout.
- Use a large floured spatula to carefully transfer to the prepared baking sheets.
- Follow baking directions above.

#3 Striped Shamrock Cookies

- Roll out long thin strips of each color dough roughly the same size.
- Trim the edges with a sharp knife.
- Cut each strip into smaller strips.
- Place the strips in the color order you like right next to each other.
- Gently go over the striped dough with a rolling pin to seal the edges.
- Cut out the shamrocks in whatever size(s) you prefer.
- Use a large floured spatula to carefully transfer to the prepared baking sheets.
- Follow baking directions above.

#4 Green Marbled Shamrock Cookies

- Gently squeeze together the cookie dough scraps. Alternately, break each of the three colored dough portions into 8-10 smaller pieces and gently squeeze all of them together.
- Gently roll the tricolored dough out onto a lightly floured work surface. Cut out the shamrocks in whatever size(s) you prefer.
- Use a large spatula to carefully transfer to the prepared baking sheets.
- Follow baking directions above.

Here are some more St. Patrick’s Day treats you can create at home: